In the earlier blog Setting Up Wazuh Server – Part 1 (Wazuh Indexer) we have successfully installed Wazuh Indexer. In this blog we shall be proceeding with installation of Wazuh Server and Dashboard components. The prerequisites for installation on Linux are the same for all three components. To install the prerequisites, you can follow steps 4 and 5 under section “Indexer Installation” in the earlier blog. Then follow the below steps for Manager installation.
Wazuh Server
Run the below command to install wazuh-manager and filebeat packages.
# apt -y install wazuh-manager filebeat
Now we need to download the pre-configured configuration file for Filebeat from Wazuh’s website. Download the file using below URL. Note that the URL may be updated based on the version of Wazuh being installed.
# curl -so /etc/filebeat/filebeat.yml https://packages.wazuh.com/4.10/tpl/wazuh/filebeat/filebeat.yml
Now to configure Filebeat to connect to our indexer, we would need to perform the following configuration steps.
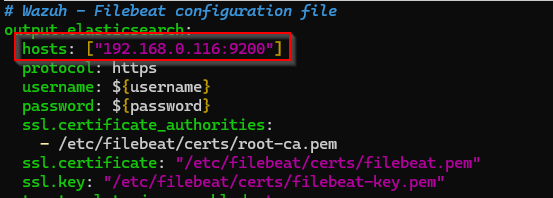
Step 1:
Let’s first edit the filebeat.yml that we downloaded in the previous step. In the hosts entry, we need to specify the ip:port for the indexer. By default, this is set to 127.0.0.1:9200. You need not change if you are running indexer and manager on the same server, like in my case. You can also use domain names instead of IP addresses. If you have multiple indexer nodes in a cluster, you can provide all the IP addresses like hosts: ["192.168.0.10:9200", "192.168.0.11:9200", "172.16.12.10:9300", "dmz-wazuh.example.com:9200"]
# Wazuh - Filebeat configuration file
output.elasticsearch:
hosts: ["10.0.0.1:9200"]
protocol: https
username: ${username}
password: ${password}
Step 2:
Now let’s create keystore to securely store the authentication credentials for indexer for Filebeat to use. Add the default credentials for indexer admin:admin to the keystore.
# filebeat keystore create
# echo admin | filebeat keystore add username --stdin --force
# echo admin | filebeat keystore add password --stdin --force
Step 3:
Download the templates for default alerts from the Wazuh website for the Wazuh indexer. Also, install the Wazuh module for Filebeat.
# curl -so /etc/filebeat/wazuh-template.json https://raw.githubusercontent.com/wazuh/wazuh/v4.10.1/extensions/elasticsearch/7.x/wazuh-template.json
# chmod go+r /etc/filebeat/wazuh-template.json
# curl -s https://packages.wazuh.com/4.x/filebeat/wazuh-filebeat-0.4.tar.gz | tar -xvz -C /usr/share/filebeat/module 
Step 4:
Now we need to deploy the certificates that we generated in Step 3 in “Indexer Installation” in our previous blog. If your setup is a multi-node / multi-server setup, ensure to have the wazuh-certificates.tar copied in every server / node. Replace the in the below command with the one used for ‘Server’ component in the configuration file created in step 2 in “Indexer Installation” in the previous blog.
# NODE_NAME=<SERVER_NODE_NAME>
# mkdir /etc/filebeats/cert
# tar -xf ./wazuh-certificates.tar -C /etc/filebeat/certs ./$NODE_NAME.pem ./$NODE_NAME-key.pem ./root-ca.pem
# mv -n /etc/filebeat/certs/$NODE_NAME.pem /etc/filebeat/certs/filebeat.pem
# mv -n /etc/filebeat/certs/$NODE_NAME-key.pem /etc/filebeat/certs/filebeat-key.pem
# chmod 500 /etc/filebeat/certs
# chmod 400 /etc/filebeat/certs/*
# chown -R root:root /etc/filebeat/certs
Step 5:
Now the final step before the complete configuration is completed is to configure the Wazuh Indexer connection with Filebeat agent. If you do not plan to use the ‘vulnerability detection’ module in Wazuh, then you are free to skip the next steps and go to step 6.
Save the Wazuh Indexer username and password into the Wazuh manager keystore using the wazuh-keystore tool:
# echo admin | /var/ossec/bin/wazuh-keystore -f indexer -k username
# echo admin | /var/ossec/bin/wazuh-keystore -f indexer -k password
Now let’s edit the Manager configuration file stored in /etc/ossec/etc/ossec.conf. Replace 0.0.0.0 with the IP of your Indexer node(s).
<indexer>
	<enabled>yes</enabled>
	<hosts>
		<host>https://127.0.0.1:9200</host>
	</hosts>
	<ssl>
		<certificate_authorities>
			<ca>/etc/filebeat/certs/root-ca.pem</ca>
		</certificate_authorities>
		<certificate>/etc/filebeat/certs/filebeat.pem</certificate>
		<key>/etc/filebeat/certs/filebeat-key.pem</key>
	</ssl>
</indexer>
For multi-node configuration, you can enter the below with IP addresses of your Indexer nodes. Replace the sample IP addresses with your actual IP addresses.
<hosts>
	<host>192.168.0.10:9200</host>
	<host>192.168.0.11:9200</host>
	<host>192.168.0.12:9200</host>
</hosts>
The IP address of your indexer node should match the configuration in the /etc/filebeat/filebeat.yml file.
/var/ossec/etc/ossec.conf configuration

Step 6:
Now all the configurations are in place, let’s enable and start the Wazuh Manager and Filebeat services. I am using systemd, but you can also use SysV init to configure your services.
# systemctl daemon-reload
# systemctl enable wazuh-manager filebeat
# systemctl start wazuh-manager filebeat
Step 7:
To test the Filebeat configuration is successful, run the below command and you should see an output as shown in the screenshot based on your configuration.
# filebeat test output
Now we have successfully installed Wazuh Manager. Now, we need a GUI for us to view the events and alerts. For this, we will be installing the Wazuh Dashboard in our next blog.